How to create a new content
Are you a newcomer and have no idea how to create a Basic Content? This A-Z tutorial is absolutely for you! This detailed guide will show you how and where to start when making Basic Content.
- Log in to the Administrator back-end.
- You can go to the Module Manager in the Control Panel: Content → Modules or Extensions → Modules
After that, click on the 'New' button in the toolbar to create a new Module Item, or select a Module by clicking the Module's Title or check the 'check box' and click on the Edit button.
Now you are free to add, edit, remove a basic content.

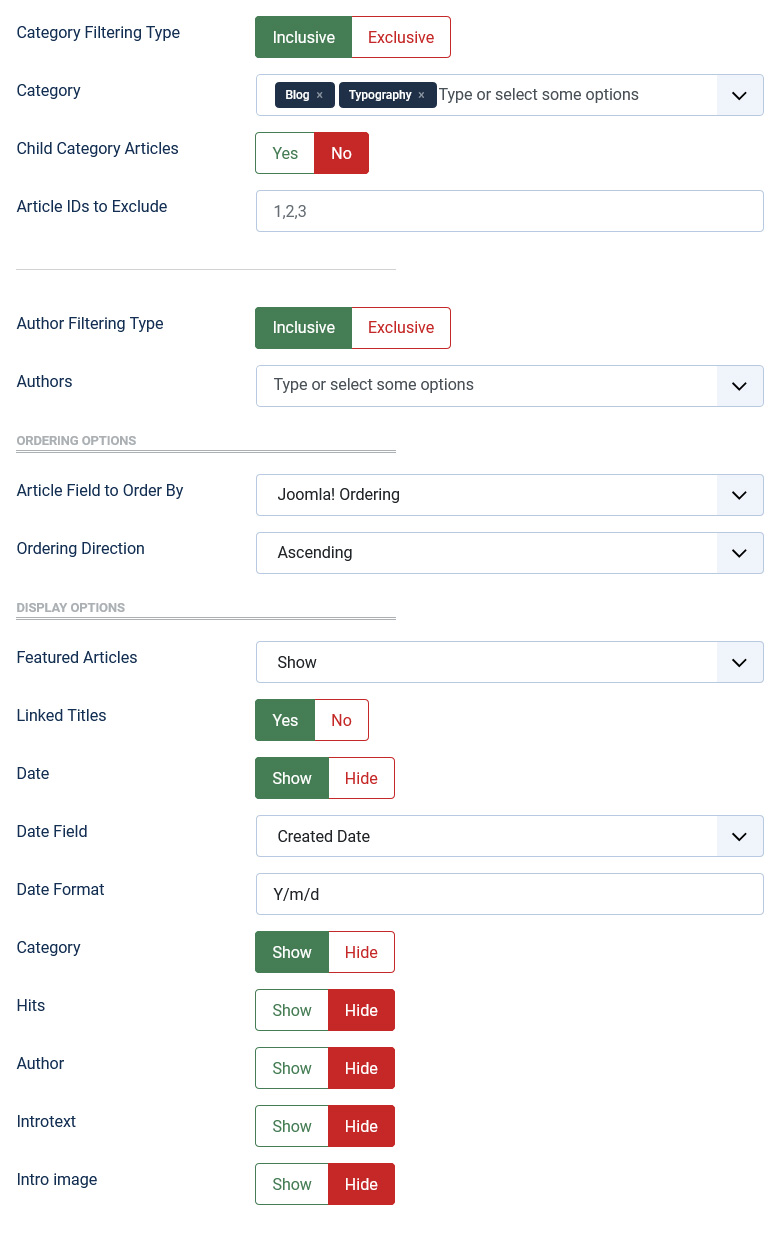
The screen contains options for naming the content, editing content and selecting parameters.
- Category Filtering Type. (Inclusive/Exclusive) Select Inclusive to Include the Selected Categories.
- Category. Selects Articles from one or more Categories.
- Child Category Articles. (Include/Exclude) Include or Exclude Articles from Child Categories.
- Article IDs to Exclude. Please enter each Article ID separated by comma.
- Author Filtering Type. (Inclusive/Exclusive) Select Inclusive to Include the Selected Author, Exclusive to Exclude the Selected Author.
- Author. Select one or more author aliases from the list below.
- Article Field to Order By. (Article Order/Hits/Title/ID/Created Date/...) Select which field you would like Articles to be ordered by.
- Ordering Direction. (Descending/Ascending) Select the direction you would like Articles to be ordered by.
- Featured Articles. (Show/Hide/Only) Select to Show, Hide, or Only display Featured Articles.
- Linked Titles. (Yes/No)
- Date. (Show/Hide) Select Show if you would like the date displayed.
- Category. (Show/Hide) Select Show if you would like the category name displayed.
- Hits. (Show/Hide) Select Show if you would like the hits for each article to be displayed.
- Author. (Show/Hide) Select Show if you would like the author to be displayed.
- Introtext. (Show/Hide) Select Show if you would like the introtext to be displayed.
- IntroImage. (Yes/No) Display Article images.
To save your work: Click the Save toolbar button to save your changes. A green message will indicate that the module has been successfully saved.