How to create a new content
Are you a newcomer and have no idea how to create a Basic Content? This A-Z tutorial is absolutely for you! This detailed guide will show you how and where to start when making Basic Content.
- Log in to the Administrator back-end.
- You can go to the Module Manager in the Control Panel: Content → Modules or Extensions → Modules
After that, click on the 'New' button in the toolbar to create a new Module Item, or select a Module by clicking the Module's Title or check the 'check box' and click on the Edit button.
Now you are free to add, edit, remove a basic content.
Adding a new content
- You can Select the Data Source: Basic
- Click on the Add new item button in the data Panel
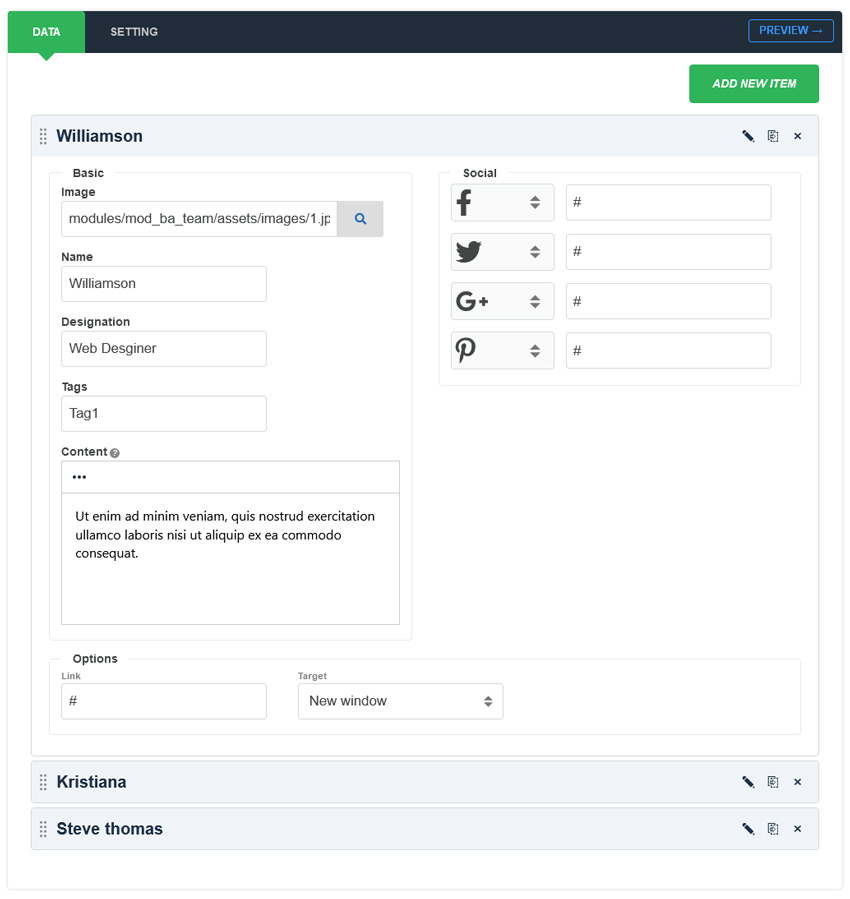
The New Item screen contains options for naming the content, editing content and selecting parameters.
- Image: Set member photo/image.
- Name: First enter member name (full name).
- Designation: Enter member job position or job title.
- Tags: You can group members in a tag and display it above the module.
- Content: Enter a short content of the member which will show on the list view page.
- Link: You can enter the link to the details page.
- Target: You can open the link in the same window or in a new window.
- Social Profiles: Add member social profiles (Facebook, Twitter, LinkedIn, Pinterest, YouTube, Instagram, Medium, Codepen, etc.) You can also set the Social profile URL here.
Editing an existing content
Clicking on the "Edit" icon to allows editing an existing basic content
Remove a content
If you wish to remove an item on your basic content, you can click on the "Remove" icon
Clone a content
Choose the content item you want to duplicate and click "Duplicate" icon on the item.
To save your work: Click the Save toolbar button to save your changes. A green message will indicate that the module has been successfully saved.